You and Your Firearm
2. Learn Local Laws
Familiarize yourself with the firearm laws in your area. These include concealed carry permits, open carry regulations, restricted areas, and self-defense laws. Ignorance of the law can lead to severe consequences, so take the time to fully understand your legal rights and responsibilities.
3. Choose the Right Equipment
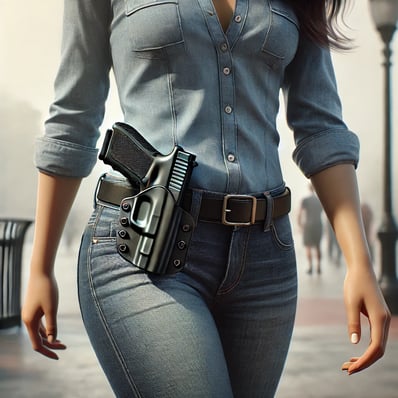
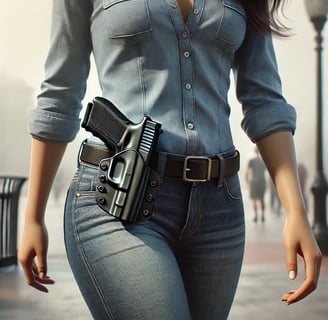
Invest in quality equipment, starting with a reliable firearm that you’re comfortable using and proficient with. Pair this with a well-fitted, secure holster designed for concealed or open carry, depending on your preference and local regulations. The holster should protect the trigger, allow for a smooth draw, and securely retain the firearm during daily activities.
4. Build a Safety Mindset
Carrying a firearm is a serious responsibility. You must commit to practicing firearm safety at all times, including keeping your finger off the trigger until ready to fire and always being aware of your muzzle direction. A responsible mindset includes knowing when to avoid conflict and when to disengage to prevent escalation.
5. Practice Regularly
Consistent practice at a range is essential to maintain proficiency. Incorporate drills that simulate real-life scenarios to build muscle memory and ensure you can react effectively if needed.
6. Assess Your Readiness
Ask yourself:
Am I confident in my training and abilities?
Do I fully understand the laws in my area?
Can I commit to the ongoing responsibility of carrying a firearm daily?
Carrying a firearm is about more than protection—it’s about preparation, responsibility, and a commitment to safety. Once you’ve met these criteria and feel mentally, legally, and physically prepared, you’ll be in a better position to carry with confidence.
When Should I Start Carrying My Pistol
Deciding when to start carrying a firearm is a deeply personal decision and should be approached with careful consideration, preparation, and responsibility. Here’s a guide to help determine if you’re ready:
1. Complete Comprehensive Training
Before carrying a firearm, ensure you've undergone proper training. This includes understanding firearm safety, handling, and basic marksmanship. Advanced training in defensive shooting, situational awareness, and stress-response management is also highly recommended. Confidence in your skills is key to carrying responsibly.
Choosing the right ammunition for your firearm is crucial for both performance and safety. Here’s a guide to help you determine what type of ammunition to use:
1. Check the Firearm’s Manufacturer Specifications
The most important step is to consult your firearm’s owner’s manual or the manufacturer’s specifications. Firearms are designed to function with a specific caliber or type of ammunition. Using the wrong type of ammo can lead to malfunctions or even damage your firearm. For example, a firearm chambered in 9mm should not be loaded with .40 S&W or other calibers.
2. Identify the Caliber of Your Firearm
Your firearm’s caliber is usually stamped on the barrel or frame. The caliber refers to the internal diameter of the firearm’s barrel and the size of the bullet that is designed to fit it. Common examples include:
9mm (for handguns)
.40 S&W (for handguns)
.45 ACP (for handguns)
.223 Remington/5.56 NATO (for rifles)
Make sure the ammunition matches the caliber specified for your firearm.
3. Understand the Type of Ammunition
There are several different types of ammunition, each designed for specific purposes. Here are a few common types:
Full Metal Jacket (FMJ): Typically used for target shooting and training, FMJ rounds are made with a solid metal casing around the bullet. They’re not ideal for self-defense due to their tendency to over-penetrate.
Hollow Point (HP): Often used for self-defense, these rounds expand upon impact, creating a larger wound channel and reducing the risk of over-penetration.
Soft Point (SP): These are similar to hollow points but expand at a slower rate, often used for hunting.
Ballistic Tip: Used in hunting, these rounds offer controlled expansion.
Frangible: Designed to break apart on impact, reducing the risk of ricochet. These are often used in training environments.
4. Consider Bullet Weight
Ammunition comes in varying bullet weights, which can affect recoil, accuracy, and terminal performance. For example:
Lighter bullets (e.g., 115 grain for 9mm) generally have higher velocities but may have more recoil.
Heavier bullets (e.g., 147 grain for 9mm) tend to have more stopping power and reduced recoil but may have slightly slower speeds.
Your firearm's manual will often recommend a range of bullet weights that work best for that particular model.
5. Check Local Regulations
In some places, certain types of ammunition, like armor-piercing or hollow-point rounds, may be restricted. Always be aware of your local laws regarding what types of ammunition you can legally purchase and use.
6. Quality and Brand
Stick to reputable manufacturers when purchasing ammunition. Known brands like Federal, Winchester, Remington, and Hornady produce reliable ammo. Avoid using cheap, off-brand ammunition, as it may not be as reliable or consistent.
7. Try Different Ammunition for Performance
If you're using the firearm for sport shooting or self-defense, you may want to test different brands or types of ammunition to see which works best for your needs. Some firearms may perform better with one type or brand of ammo over another in terms of reliability, accuracy, and recoil.
8. Consider Your Purpose
The type of ammunition you choose should match your intended use:
For self-defense: Hollow point or similar defensive ammo is ideal.
For training and practice: Full Metal Jacket (FMJ) ammo is usually the most economical and reliable option.
For hunting: Soft point or ballistic tip ammunition will work best, depending on the game you're targeting.
In short, always refer to your firearm's manual, use the proper caliber, choose the right type of ammo for your purpose, and ensure that you're following legal requirements. If in doubt, consult with a knowledgeable professional or firearms instructor.
Ammunition Selection for Your Firearm
Zeroing your firearm means adjusting the sights or optics so that the point of impact of the bullet aligns with the point of aim at a specific distance. This process ensures that when you aim at a target, the bullet will hit where you are aiming, allowing for more accurate shooting.
Why You Should Zero Your Firearm:
Accuracy and Precision
Zeroing your firearm ensures that your shots land exactly where you aim. Without proper zeroing, your shots may land high, low, left, or right of your target, depending on how your firearm is set up. This can result in missed targets or ineffective use of your firearm, especially in high-stakes situations like self-defense or competitive shooting.Consistency
Once your firearm is zeroed, you can consistently rely on it to hit your target at a set distance. This consistency is crucial for any shooter, whether for recreational shooting, hunting, or self-defense. Knowing that your firearm is zeroed gives you the confidence to make each shot count.Improved Performance
Zeroing is essential for ensuring the performance of your firearm is optimized. For firearms with optics (like red dot sights or scopes), zeroing allows you to take full advantage of the precision offered by these accessories. For iron sights, zeroing ensures they are aligned for the best possible view and aim.Adaptability for Different Distances
Zeroing typically happens at a specific distance (e.g., 25, 50, or 100 yards), but you can adjust it for multiple distances based on your needs. Once zeroed, you'll know how your bullet trajectory behaves over longer or shorter distances, allowing you to adjust your aiming point accordingly.Enhanced Confidence
Whether you're a beginner or an experienced shooter, zeroing builds confidence. You will know that your firearm is set up properly, and you won’t be guessing if your shots are off due to improper sight alignment.
How to Zero Your Firearm:
Zeroing your firearm usually involves shooting a few rounds at a target, adjusting your sights or optics based on where the shots hit, and repeating this process until the shots are consistently landing at the desired point of impact. This process can be done at various distances. With a Red Dot Optic Pistol one may select 10, 15 or 20 yards depending what suites your style of shooting best. For self defense we might argue that 10-15 yards would be just fine. If you were shooting carbine or rifle, the most common zero range being 25 to 100 yards for a rife, depending on your firearm and intended use.
In conclusion, zeroing your firearm is vital for accuracy, consistency, and confidence in your shooting. It allows you to use your firearm effectively, whether for sport, hunting, or self-defense, ensuring you hit your target where you intend to.
Have You Zeroed Your Pistol
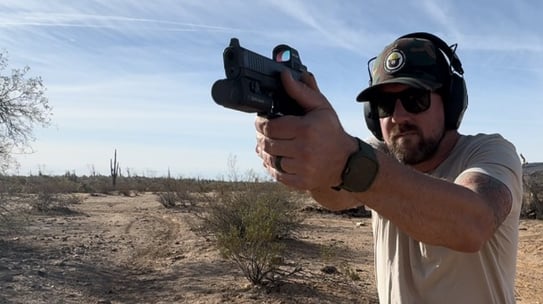
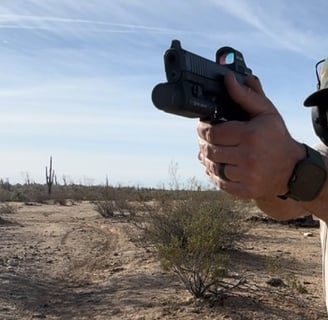
What Are Optics or Red Dot
Common Types of Optics for Pistols:
Red Dot Sights (RDS): A red dot sight projects a small illuminated red dot onto a lens, allowing you to align it with your target. These sights are popular for their simplicity and quick target acquisition.
Holographic Sights: Similar to red dot sights but use holography to create a more precise aiming point. Holographic sights can be more durable and have less parallax error, making them great for rapid, accurate aiming at varying distances.
Reflex Sights: Reflex sights use a reflective lens to create a reticle or aiming point. These sights are typically lightweight and offer a wide field of view, ideal for fast-moving targets.
Variable Magnification Scopes: Some pistols, especially for hunting or tactical use, can be equipped with scopes that provide magnification for longer-range shooting. These are less common for typical defensive use but are used in specific situations.
Why You Might Want to Use One:
Faster Target Acquisition: With traditional iron sights, you must align the front and rear sights while also focusing on the target. With a red dot or other optic, you can simply place the red dot on your target and fire, significantly speeding up the process of acquiring and engaging the target.
Improved Accuracy: Optics allow for more precise aiming since they provide a single point of focus (the red dot or reticle) rather than requiring you to align two different sights (front and rear). This makes it easier to hit your target, especially in stressful or fast-paced situations.
Better Low-Light Performance: Optics, especially red dot and holographic sights, are often designed to be usable in low-light conditions. Unlike iron sights, which can be difficult to see in dim environments, optics provide a clear aiming point even in dark or low-visibility settings.
Enhanced Situational Awareness: Many optics offer a wider field of view compared to iron sights, which allows you to maintain better situational awareness while engaging targets. This is especially useful in dynamic or tactical situations where you need to quickly identify and react to threats.
Less Recoil Sensitivity: Optics are designed to remain fixed on the target and stay in the line of sight, even if the shooter experiences recoil. This reduces the need to realign sights after each shot, improving follow-up shot speed and accuracy.
Increased Confidence for New Shooters: Beginners often find it easier to use optics since the concept of aligning sights is simplified. This can increase their confidence and improve their overall shooting experience.
Tactical Advantage: For law enforcement or military personnel, having an optic on a pistol can be invaluable in tactical situations. It allows for rapid target engagement in fast-moving, high-stress environments, giving you a potential edge in critical situations.
Considerations:
Battery Life: Many optics, especially red dot sights, require batteries. Depending on the optic, battery life may vary, so it’s essential to regularly check and replace the battery as needed.
Durability: Optics are generally more sensitive than traditional iron sights. While many modern pistol optics are built to withstand recoil and environmental conditions, there is a higher chance of failure under extreme conditions.
Learning Curve: While optics are beneficial, there is a learning curve. Shooters need to practice with optics to understand how to effectively use them, especially in terms of adjusting settings like brightness and reticle style.
Optics on modern pistols can provide a substantial advantage by improving speed, accuracy, and overall shooting performance. Whether you're using your pistol for self-defense, competition, or recreational shooting, optics can enhance your ability to engage targets efficiently and confidently.
Optics for Modern Pistols:
Optics for modern pistols are sights or scopes that enhance your ability to aim accurately, often through the use of red dot sights (RDS), holographic sights, or reflex sights. These optics allow for faster target acquisition and improved precision compared to traditional iron sights. They are mounted onto the firearm’s slide and can be used to engage targets more effectively, especially in dynamic or high-pressure situations.
Basic Steps to Clean a Semi-Automatic Pistol
Safety First:
Ensure the firearm is unloaded. Remove the magazine and visually and physically inspect the chamber to confirm it's empty. Remove ALL live ammunition from your work area!
Disassemble the Pistol:
Follow your firearm’s manual to field strip it into its basic components: slide, barrel, guide rod, and frame.
Clean the Barrel:
Use a bore brush and cleaning solvent to scrub the inside of the barrel.
Run clean patches through the barrel until they come out clean.
Clean Other Components:
Wipe down the slide, frame, and guide rod with a solvent-soaked cloth or brush.
Remove carbon buildup and debris from all accessible areas.
Do NOT use anything abrasive to clean the exterior of the firearm.
*If your firearm has any type of fancy finish, again please refer to your firearms manual.
We can't be held responsible for your lack of reading/researching you own firearm's care.
Lubricate:
Apply a small amount of firearm oil to key points like the slide rails and barrel exterior.
Avoid over-lubricating to prevent attracting dirt.
Reassemble and Function Check:
Put the pistol back together and perform a basic function check to ensure everything works correctly.
Tips:
Clean after every use or periodically if stored. Don't get caught carrying a dirty firearm.
Always refer to your firearm’s manual for specific cleaning instructions.
*The manual may provide greater detail on cleaning intervals or a break down of parts to clean and when.