Firearm Safety
ALWAYS keep the gun pointed in a safe direction!
ALWAYS keep your finger off the trigger until ready to shoot!
ALWAYS keep the gun unloaded until ready to use it!
Rule #1: ALWAYS keep the gun pointed in a safe direction. If a gun is pointed safely and it accidentally fires—whether due to a trigger pull or malfunction—no one will be harmed. Property damage is costly and inconvenient, but it’s better than risking injury.
This rule applies to all guns, including those used in training. How you practice is how you’ll perform in real situations! While Rules #2 and #3 allow some flexibility for different activities, like recreational shooting or hunting, Rule #1 is non-negotiable for everyone.
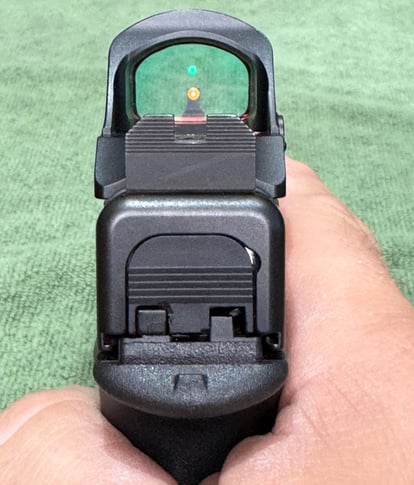
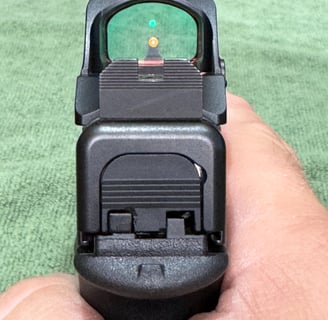
Rule #2: ALWAYS keep your finger off the trigger until you’re ready to shoot. A safe shooter grips the gun with their trigger finger straight and outside the trigger guard. As they raise the gun to aim, the finger only moves inside the guard when they’re ready to fire. Once the gun is lowered, the finger returns outside the guard, resting alongside the pistol frame.
If utilizing a holster the shooter will draw their firearm keeping their trigger finger straight and outside the trigger guard. As the firearm is raised to aim, coming on target, the finger only moves into the gaurd when ready to fire. Again when the gun is lowered, the trigger finger returns to outside the guard, resting alongside the pistol frame. With that trigger finger outside the guard safely return the firearm to the holster and secure any retention devices if present.
Rule #3: ALWAYS keep the gun unloaded until you’re ready to use it. "Ready to use" depends on your activity or the determined function of the firearm. For example, recreational and competitive shooters load only after the range officer's command. Hunters follow state loading regulations. Those carrying concealed load at home so they're prepared for emergencies. If your firearm isn’t going to be "in use," store it safely—unloaded and secured.
The Run Down
Understanding the 3 “Always” Rules of Firearm Safety
When it comes to firearm safety, the NRA’s three “Always” rules are essential to follow. Let’s break down each one and address some common questions that often come up, especially with Rule #3.
Rule #1: ALWAYS Keep the Gun Pointed in a Safe Direction
This is one of the most basic principles of firearm safety, and it’s as straightforward as it sounds: never point a firearm at anything you’re not prepared to destroy—whether it’s life or property. This rule is simple but powerful, as it prevents the most dangerous outcomes if a firearm discharges unexpectedly. Treat this as a habit: anytime you handle a firearm, be mindful of where it’s pointed.
Rule #2: ALWAYS Keep Your Finger Off the Trigger Until Ready to Shoot
This rule often gets summed up as: If you’re not on target, you’re not on the trigger. The importance here is to make sure your finger stays safely outside the trigger guard until you’re fully prepared to fire. Whether you’re practicing your draw or lining up on a target, that trigger finger should stay straight and outside the guard. It’s a simple move that adds a crucial layer of control and safety.
Rule #3: ALWAYS Keep the Gun Unloaded Until Ready to Use
Rule #3 is where questions often come up. What does “ready to use” actually mean? Well, the answer depends on your intent.
For a recreational or competitive shooter, “ready to use” might mean loading only after a range officer gives the command. For a hunter, it could mean loading based on state regulations once at the hunting site. But for someone who keeps a firearm at home for self-defense, “ready to use” has a different meaning entirely.
In my case, I have a firearm at home that’s loaded and secured in a small safe for home protection purposes. I consider this firearm “in use” because it’s specifically stored for immediate access in an emergent need. But when I take it to the range to practice, I’ll follow strict safety procedures. I remove it from the safe with my finger off the trigger and keep it pointed in a safe direction. Then, I unload it, place it in a case, and transport it securely to the range.
Why “Ready to Use” Means Something Different for Everyone
The beauty of Rule #3 is its flexibility. It’s designed to adapt to different situations and needs. Whether your purpose is sport, hunting, or self-defense, you can apply this rule responsibly in a way that suits your purpose.
Following these three rules isn’t just a checklist—it’s a mindset that we cultivate every time we handle a firearm. And by integrating them into our daily habits, we can enjoy the confidence and security that comes from safe, responsible firearm ownership.
Remember, safety isn’t something you only practice at the range; it’s a way of thinking and acting, wherever you go with your firearm.
Concealed Carry Holster
When it comes to concealed carry holsters, the world is your playground—well, almost. A concealed carry holster is specifically designed to keep your firearm secure, accessible, and discreetly hidden from view. It’s a cornerstone of responsible concealed carry, balancing comfort, safety, and readiness.
Of course, where you live and what you wear play a big role. If you're rocking a coat or hoodie all day, congratulations—you've unlocked easy mode, with endless holster options. But if you’re living somewhere as hot as the surface of the sun, things get trickier. In that case, you might want to ditch the layers and consider alternatives like a shoulder bag—or at least invest in a holster that doesn’t feel like a portable sauna!
Key Features of a Concealed Carry Holster
Concealment
Designed to minimize printing (the outline of the firearm showing through clothing) and keep the firearm discreetly hidden.
Retention
Provides enough retention to keep the firearm secure during movement, but allows for a smooth, quick draw. Some models offer adjustable retention levels.
Comfort
Made with materials like soft leather, breathable fabrics, or molded polymers to prevent irritation during extended wear.
Accessibility
Positioned for a fast, natural draw in case of an emergency.
Trigger Guard Protection
Fully covers the trigger to prevent accidental discharges.
Common Types of Concealed Carry Holsters
Inside-the-Waistband (IWB)
Worn inside the waistband of pants, making it the most popular style for concealment.
Advantages: Excellent concealment; works with a variety of clothing.
Disadvantages: Can feel snug, especially with improper sizing or fit.
Outside-the-Waistband (OWB)
Worn outside the waistband but can be concealed with a jacket or loose shirt.
Advantages: Easier access; often more comfortable.
Disadvantages: Harder to conceal without layering.
Appendix Carry (AIWB)
A subset of IWB, carried at the front of the waistband.
Advantages: Quick access; excellent concealment for smaller firearms.
Disadvantages: Can be uncomfortable when sitting or for extended wear.
Pocket Holsters
Fits in a pocket and is designed for small firearms.
Advantages: Highly discreet; no need for a belt.
Disadvantages: Slower draw and limited to smaller guns.
Ankle Holsters
Strapped to the ankle, ideal for a backup firearm.
Advantages: Very discreet; great for secondary weapons.
Disadvantages: Slower access; limited to smaller guns.
Shoulder Holsters
Worn under the arm with a harness system.
Advantages: Works well with jackets; good for larger firearms.
Disadvantages: Requires additional layering for concealment.
Belly Bands or Compression Garments
Elastic bands or clothing with built-in holster pockets.
Advantages: Extremely versatile and concealable.
Disadvantages: Can be less secure or comfortable over time.
Why It’s Important
A good concealed carry holster does more than just hide your firearm—it ensures it stays securely in place, protects the trigger, and positions the gun for a safe and efficient draw. Choosing the right holster is essential for comfort, concealment, and responsible carry.
Duty Style Belt
The Average duty belt will be available in a 2" or 2 1/4" sizing meaning that the height of the belt while on your waist is either the 2" or 2 1/4". When purchasing items to go on your belt, while most are universal, be sure they are going to fit on the belt size of your choice.
Key Features of a Duty Belt
Material and Durability: Usually made of leather or reinforced nylon, built to withstand daily wear and the weight of essential gear.
Rigidity: A stiff construction prevents sagging, ensuring that the officer’s gear stays secure and accessible.
Attachment Points: Designed to carry critical tools like a firearm, handcuffs, baton, radio, taser, pepper spray, and magazine pouches.
Keepers and Suspenders: Often paired with belt keepers or suspenders to evenly distribute the load and prevent shifting.
Other Features to Note
Uniform Standardization: Many styles are available. Know what your employer requires or allows. Color is even an option.
Ergonomics: Different designs are better on balancing heavy loads, ultimately making it more comfortable for those longer shifts.
Accessibility: From the very start of building your belt think of where you would like items to be placed for quick response.
Tradition: The Sam Browne is the style that has a rich history in policing, symbolizing authority and readiness.
While modern alternatives like modular belts or tactical belts are emerging, they may or not be the professional look if using a duty belt for work. Some departments are trying to stay away from a "tactical" appearance. Before spending money on uniform items such as these know what your manual and uniform regulations are to simply not waste money. If this is not for an employer and you're just building a response built for yourself, good for you, that's awesome!
Quick History on Origins of the Sam Browne Belt
Who Was Sam Browne?
Sam Browne was a British Army officer who served in India during the mid-1800s. He lost his left arm in combat, which made it difficult for him to draw his sword using the traditional belt setup.The Innovation
To compensate, he designed a belt with a diagonal shoulder strap. This strap secured the belt and allowed him to draw his sword one-handed without the belt shifting. His design proved practical for other officers, regardless of physical limitations.
The Right Firearm for You
Choosing a firearm for duty or concealed carry depends on several factors, including your intended use, comfort level, and the legal requirements in your area. Here's a guide to help you make an informed choice:
1. Purpose of the Firearm
Duty Use:
Typically requires a full-size firearm for better accuracy, magazine capacity, and durability.
Look for models with high reliability under harsh conditions and extended use.
Concealed Carry:
Opt for compact or subcompact models that are easier to conceal and carry comfortably throughout the day.
2. Comfort and Fit
Grip Size: Ensure the firearm feels comfortable and secure in your hand.
Weight: A heavier firearm absorbs recoil better, but it may be cumbersome for concealed carry.
Trigger Reach: Ensure you can comfortably reach and operate the trigger.
3. Caliber Selection
Common Choices:
9mm: Popular for its balance of power, capacity, and manageable recoil.
.40 S&W or .45 ACP: Offers more stopping power but may have more recoil and reduced capacity.
.380 ACP: Common for ultra-compact concealed carry firearms; less recoil but also less power.
Match the caliber to your comfort level, shooting skill, and intended purpose.
4. Reliability
Choose a proven firearm brand and model with a good track record for reliability.
Test fire the firearm at a range to ensure it functions well and consistently.
5. Capacity
Duty firearms often prioritize higher capacity (e.g., 15–17+ rounds).
Concealed carry may require a balance between capacity and firearm size.
6. Features
Sights: Night sights or optics-ready options may enhance accuracy.
Safety Mechanisms: Consider manual safeties or trigger safeties based on your comfort.
Accessory Compatibility: For duty, you may need a firearm compatible with weapon lights or optics.
7. Training and Practice
Ensure you are trained and proficient with the firearm you choose.
A simpler firearm design (e.g., striker-fired models like Glock or Sig Sauer P320) may be easier to master.
8. Legal Considerations
Research and comply with local laws regarding firearm ownership, carry permits, and allowed features.
9. Budget
Balance quality with affordability. Consider a reputable mid-range firearm if you're on a budget.
Popular Duty/Concealed Carry Options
Duty: Glock 17/19, Sig Sauer P320, Smith & Wesson M&P9
Concealed Carry: Glock 43/43X, Sig Sauer P365, Springfield Hellcat, Smith & Wesson Shield Plus
Ultimately, the best firearm is the one you can handle safely, shoot accurately, and carry comfortably. It's highly recommended to test different firearms at a range before making a decision.