The Gunfighter's Stance
So, let’s talk about shooting stances—you know, that thing where you place your feet “just right” like you’re posing for a catalog. Sure, having a stable stance can help line up your shots, but here’s the million-dollar question: do you really need to strike a perfect yoga pose to hit the target? Spoiler alert: nope.
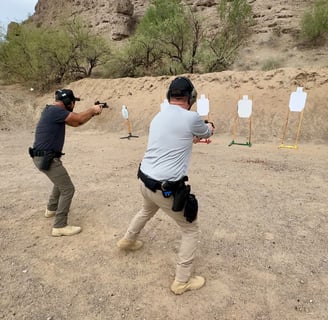
In a gunfight, you need to move—not shuffle like you’re playing Twister but actually move with purpose. Does that mean you can’t shoot while moving? Absolutely not. In fact, you should be laying down accurate fire while on the move. And where will your feet be? Right under you, where they’ve been your entire life.
Think about it: how long have you been walking? How often do you fall over doing it? Unless you’re auditioning for America’s Funniest Home Videos, you’re probably pretty good at staying upright. Walking is as natural as breathing, and the good news is, we don’t need to spend a week teaching you how to do it. That’s our “stance on stances”: stay mobile, stay balanced, and adapt.
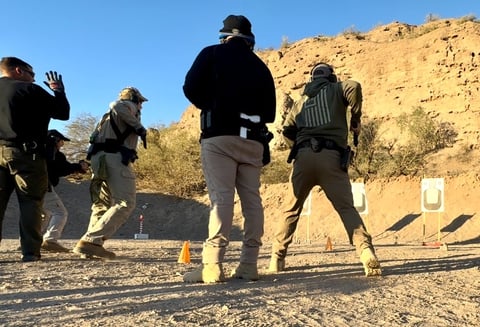
Now, let’s get real—moving doesn’t always mean charging straight at your target like you’re in a bad action movie. What happens when you move toward your target? Oh yeah, you’re making yourself a bigger target. Food for thought, right? Get off the X. Create angles. Whoever you are engaging hasn't been training like you.
Remember, tactical shooting isn’t just about punching holes in paper; it’s about surviving and thriving in chaos. Move with a purpose, engage smartly, and, most importantly, don’t overthink where your feet are. Keep them under you, and keep moving. That’s how you win the fight. Now for your qualification or organized shooting range, pick one of the stances listed below.

NRA Fundamentals of Stance
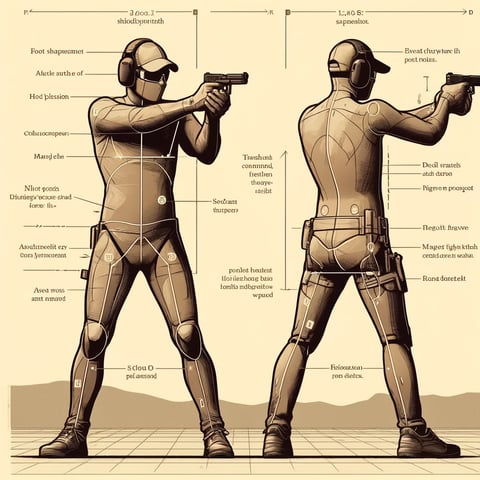
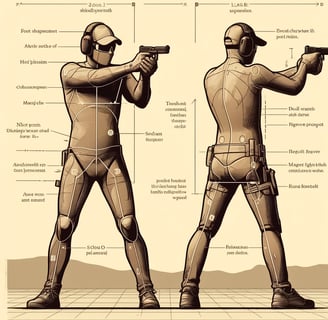
This outlook provides a framework for building a stable, balanced, and consistent shooting position. Your stance is a crucial part of accurate shooting because it affects stability, recoil management, and the ability to engage targets quickly and effectively. Here's a breakdown of the fundamentals:
1. Balance
Keep your weight evenly distributed between both feet.
Lean slightly forward into the shot, shifting your weight slightly onto the balls of your feet.
Avoid leaning back, as this destabilizes your stance and reduces control over recoil.
2. Foot Placement
Width: Position your feet shoulder-width apart for a solid base.
Angle: Adjust the angle of your feet based on your chosen stance (see below for stance types).
Ensure your feet remain planted firmly on the ground.
3. Body Position
Upper Body: Keep your upper body forward and your shoulders engaged, creating a slight forward lean toward the target.
Head: Align your head naturally with your sights; avoid craning or tilting excessively.
Arms: Extend your arms fully but not locked, maintaining a firm grip on the firearm.
4. Knees
Keep your knees slightly bent to absorb recoil and allow for dynamic movement.
Avoid locking your knees, as this reduces mobility and stability.
5. Consistency
The key to mastering your stance is consistent practice.
A consistent stance ensures that your shots remain predictable and accurate across different scenarios.
Types of Stances
The NRA recognizes several common stances, each with advantages depending on the situation and shooter preference:
Isosceles Stance
Feet are shoulder-width apart, squared to the target.
Arms form an isosceles triangle with the firearm.
Natural and easy for most shooters, offering good stability and recoil management.
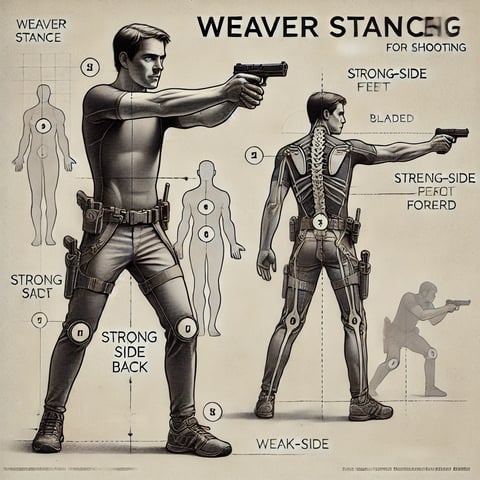
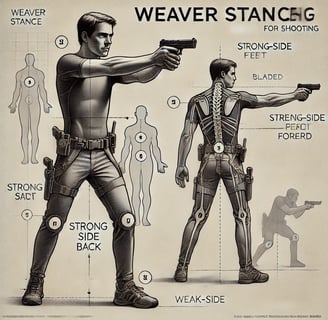
Weaver Stance
Strong-side foot is back, weak-side foot forward, creating a bladed position.
Strong arm is straight, weak arm bent.
Offers good recoil control with a more compact profile but requires practice to master.
Modified Weaver or Chapman Stance
Similar to the Weaver, but the strong arm is fully extended for better consistency and sight alignment.
Good for shooters with larger builds or those using heavier firearms.
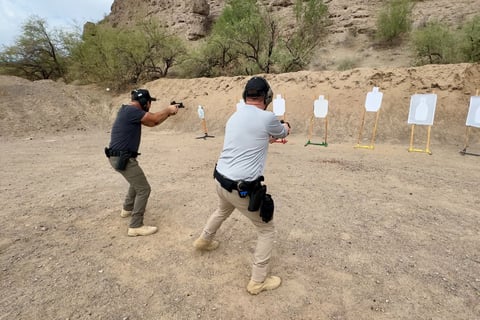
Fighting or Tactical Stance
Feet are staggered slightly (like a boxer’s stance), with knees bent and weight forward.
Ideal for dynamic or defensive shooting scenarios requiring quick movement.
Practicing Your Stance
Practice dry firing or at the range to ensure your stance feels natural and supports your shooting mechanics.
Experiment with different stances to find what works best for you and your shooting goals.
By mastering these stance fundamentals, you build a strong foundation for safe and effective shooting.
Here’s a step-by-step guide to help you get started:
1. Explain the Basics
Purpose: Highlight that the isosceles stance provides stability, balance, and recoil control, making it ideal for most shooting scenarios.
Visual Reference: Explain the name: the arms and chest form a triangle resembling an isosceles.
2. Set the Feet
Stance:
Feet shoulder-width apart.
Toes pointing straight toward the target.
Weight distributed evenly on both feet, slightly forward on the balls of the feet.
3. Position the Arms
Fully extend both arms in front, holding the firearm with a two-handed grip.
Keep the elbows slightly unlocked to help absorb recoil.
4. Grip the Firearm
Use a proper two-handed grip:
Dominant hand firmly around the firearm, with the trigger finger resting outside the trigger guard until ready to fire.
Support hand wrapping over the dominant hand, thumbs pointing forward.
5. Square the Shoulders
Shoulders should face directly toward the target, forming a square with the torso.
Slight forward lean at the waist to counteract recoil.
6. Head and Eyes
Keep the head upright and aligned with the sights.
Use the dominant eye for aiming (or both eyes open, depending on the situation and shooter preference).
7. Demonstrate
Show the position yourself or use a video example.
Slowly transition into the isosceles stance to help students visualize each step.
8. Hands-On Practice
Have students mimic your demonstration with an unloaded firearm or training tool.
Adjust their stance and grip as needed.
9. Practice Drills
Static drills: Focus on stance, grip, and sight alignment.
Recoil control drills: Use live fire to help them feel how the stance manages recoil.
Additional Tips:
Safety First: Ensure you follow all firearm safety rules throughout the session.
Adaptability: Reminder, while the isosceles stance is versatile, individual body mechanics might require minor adjustments.
The ISOSCELES Position
The Concept
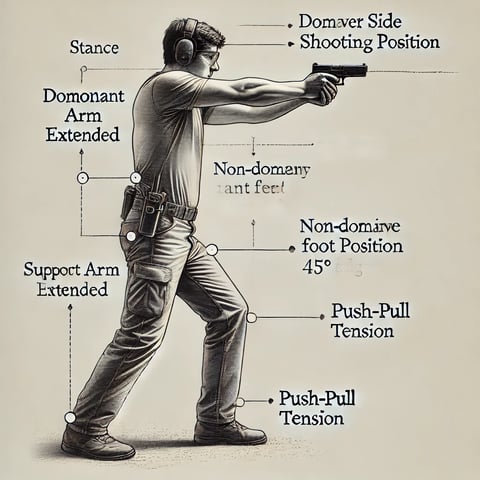
The Weaver stance is a bladed, tension-driven shooting position designed for stability and recoil control. It uses a "push-pull" dynamic between the arms.
Feet Placement
Staggered Stance: Dominant foot slightly back, non-dominant foot forward, both at a 45-degree angle to the target.
Weight should be balanced, slightly forward on the balls of the feet.
Arm Position
Strong Arm: Fully extend the dominant arm forward, holding the firearm.
Support Arm: Bend the support arm at the elbow, pulling it slightly downward and back.
Push-Pull Tension
Push: The dominant hand pushes forward on the firearm.
Pull: The support hand pulls back slightly for counter-tension.
This creates a stable platform and helps manage recoil.
Torso Alignment
The torso is angled to match the staggered feet, presenting a smaller profile to the target.
Shoulders are angled but relaxed, with the head upright and aligned with the sights.
Grip
Use a two-handed grip:
Dominant hand firmly on the firearm.
Support hand wraps around, thumbs pointing forward.
Demonstrate
Show the stance step by step: footwork, arm placement, and grip.
Provide side and front views for a clear understanding.
Practice Drills
Dry Fire: Start with dry-fire drills to refine the stance and push-pull technique.
Live Fire: Practice managing recoil with live rounds, emphasizing consistent body alignment and tension.
Provide Feedback
Correct foot positioning, arm angles, and grip tension.
Ensure students feel the "push-pull" dynamic working effectively.
Tips for Effective Teaching
Keep safety a priority.
Encourage adaptability for individual body types.
Build confidence by reinforcing progress.
The WEAVER Position
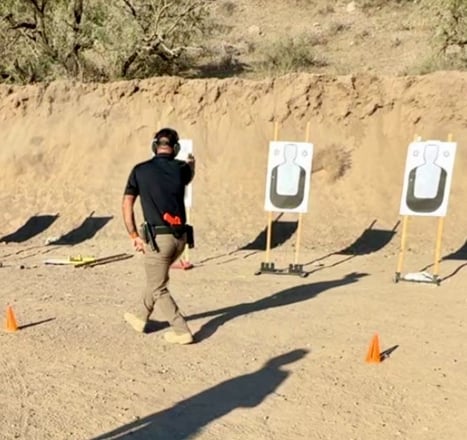
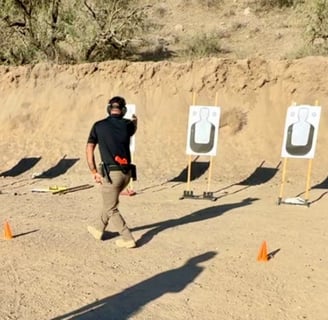
So now that we have a favorite stance and we are set on how we like to shoot standing still, let’s talk about moving and shooting.
Recently, at the beginning of 2024, the Arizona POST qualification introduced a walking movement drill from the 5-yard to the 3-yard line while firing multiple shots on target. This change reflects the reality of many practical shooting scenarios where staying stationary isn't an option. Unfortunately, many shooters don’t train to engage targets while moving, leaving a critical gap in their skills. Let see if we can help with that!
Building the Foundation for Moving and Shooting
1. Understand the Objective
The goal of moving and shooting is to maintain accuracy and control while reducing your vulnerability by avoiding being a stationary target. Movement should enhance your tactical advantage, not compromise your shooting fundamentals.
2. Start with Slow, Controlled Movement
Before adding live fire, practice moving without shooting to build confidence in your footwork and body mechanics.
Choose Your Direction: Begin with forward movement, as it’s the most intuitive. Once comfortable, expand to backward and lateral movements.
Maintain a Proper Stance: Even while walking, your shooting stance should stay intact. Keep your knees bent, weight slightly forward, and your firearm in your "workspace."
3. Forward Movement
To advance toward a target:
On flat surfaces take normal size, deliberate steps, rolling heel-to-toe to minimize upper body movement.
Keep your eyes on the target and your sights aligned.
Maintain a consistent shooting rhythm, firing between steps when your body is at its steadiest.
4. Backward Movement
When retreating:
Step back by extending one foot behind you, rolling from toe to heel.
Avoid leaning backward, as it can disrupt your balance and shooting alignment.
Keep your shoulders square to the target while stepping cautiously to avoid tripping.
5. Lateral Movement
Sidestepping or moving diagonally can help you avoid threats or gain better angles.
Lead with the foot closest to the direction you’re moving.
Cross your feet only when necessary, and do so carefully to prevent tangling.
Ensure your firearm stays aligned with the target as you move.
6. Integrate Shooting with Movement
Once you’ve mastered footwork, start adding live fire into your drills:
Begin at close distances with slow, deliberate steps and controlled shots.
Focus on maintaining sight alignment and trigger control, even while in motion.
Gradually increase your speed as you become more confident, but never sacrifice accuracy for speed.
7. Managing Recoil While Moving
Recoil control becomes more challenging when you’re on the move.
Keep a firm grip on the firearm and stay consistent with your technique.
Engage your core muscles to stabilize your upper body and minimize excessive movement.
8. Simulate Realistic Scenarios
To make your training practical:
Incorporate drills that simulate real-life encounters, such as moving toward or away from a target while engaging.
Practice transitioning between movement directions to prepare for dynamic situations.
Use props or cover to mimic obstacles and train for real-world applications.
9. Practice Regularly
Like any skill, moving and shooting require consistent practice. Work on integrating this into your regular range sessions, starting with dry fire and progressing to live fire drills.
By mastering the ability to engage targets while moving, you’ll significantly improve your shooting capabilities and tactical proficiency. This skill can be the difference between success and failure in a real-world defensive situation.